✂️[스프링 시큐리티 OAuth2] 리소스 서버 권한 구현
1. Scope 기반 권한 설정
✓ Scope
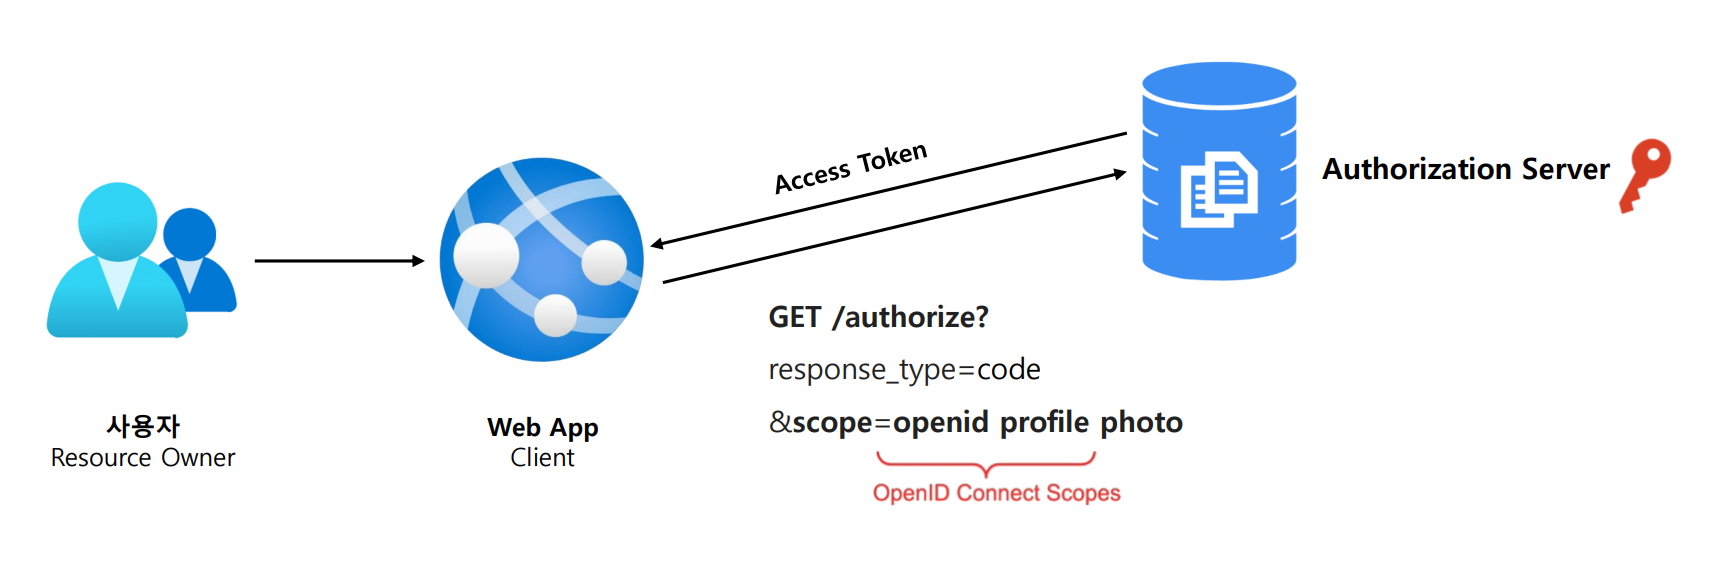
- 클라이언트가 인가서버로 OAuth 2.0 권한 부여 요청을 할 때 사용자의 리소스에 대한 접근 범위를 제한하기 위해 마련해 놓은 장치
- 클라이언트는 하나 이상의 scope 를 요청할 수 있으며 동의 화면에서 사용자가 scope 를 지정하게 되면 scope 범위에 제한된 토큰이 발행된다
✓ Scope 로 리소스 접근 제어
- 권한 부여 요청시 인가서버에 지정했던 scope 가 리소스 서버의 권한 범위에 포함하지 않으면 접근이 거부된다
- 권한 부여 요청시 인가서버에 지정했던 scope 가 리소스 서버의 권한 범위에 포함되면 접근이 허용된다
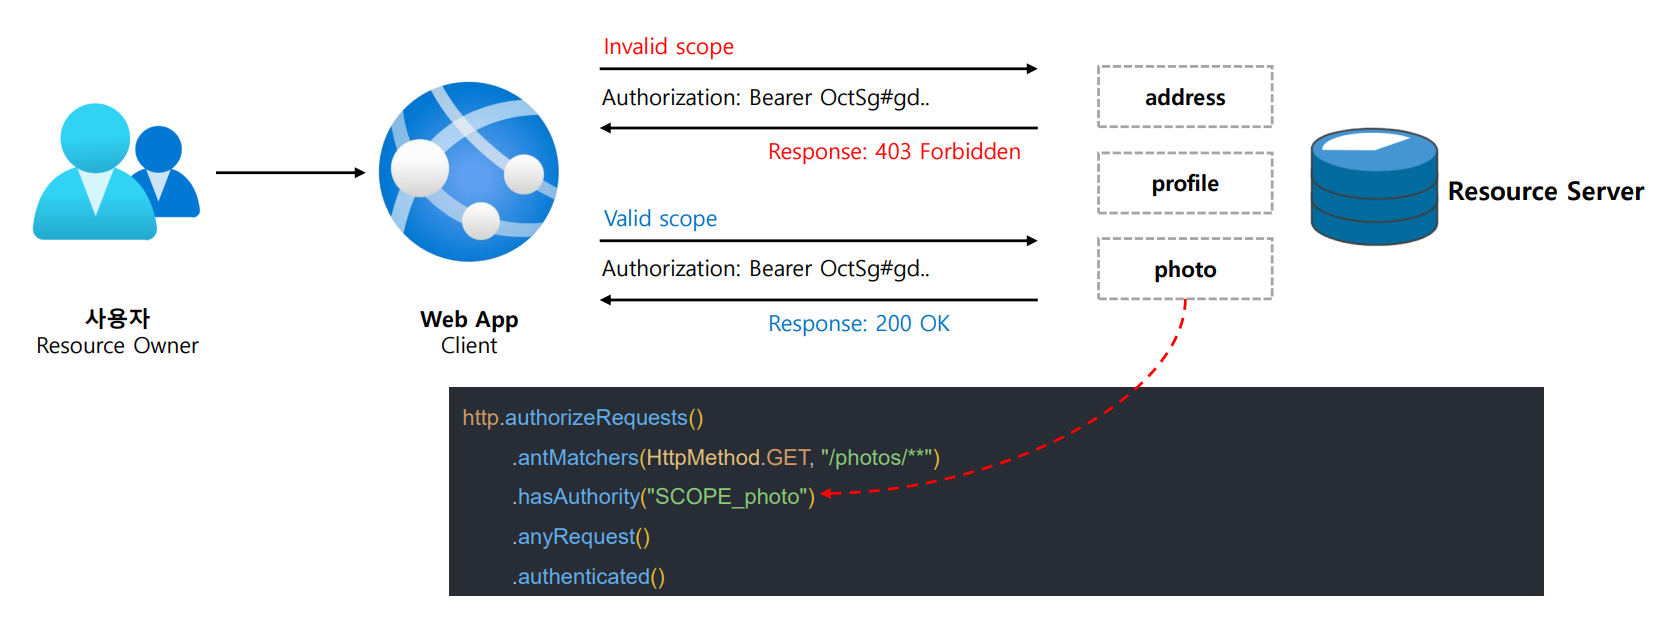
- 리소스 서버는 각 스코프에 “SCOPE_” 프리픽스를 달아 승인된 권한 리스트를 만든다.
- JWT의 scope로 특정 엔드포인트나 메소드를 보호하려면, 프리픽스를 포함한 적절한 표현식을 사용해야 한다
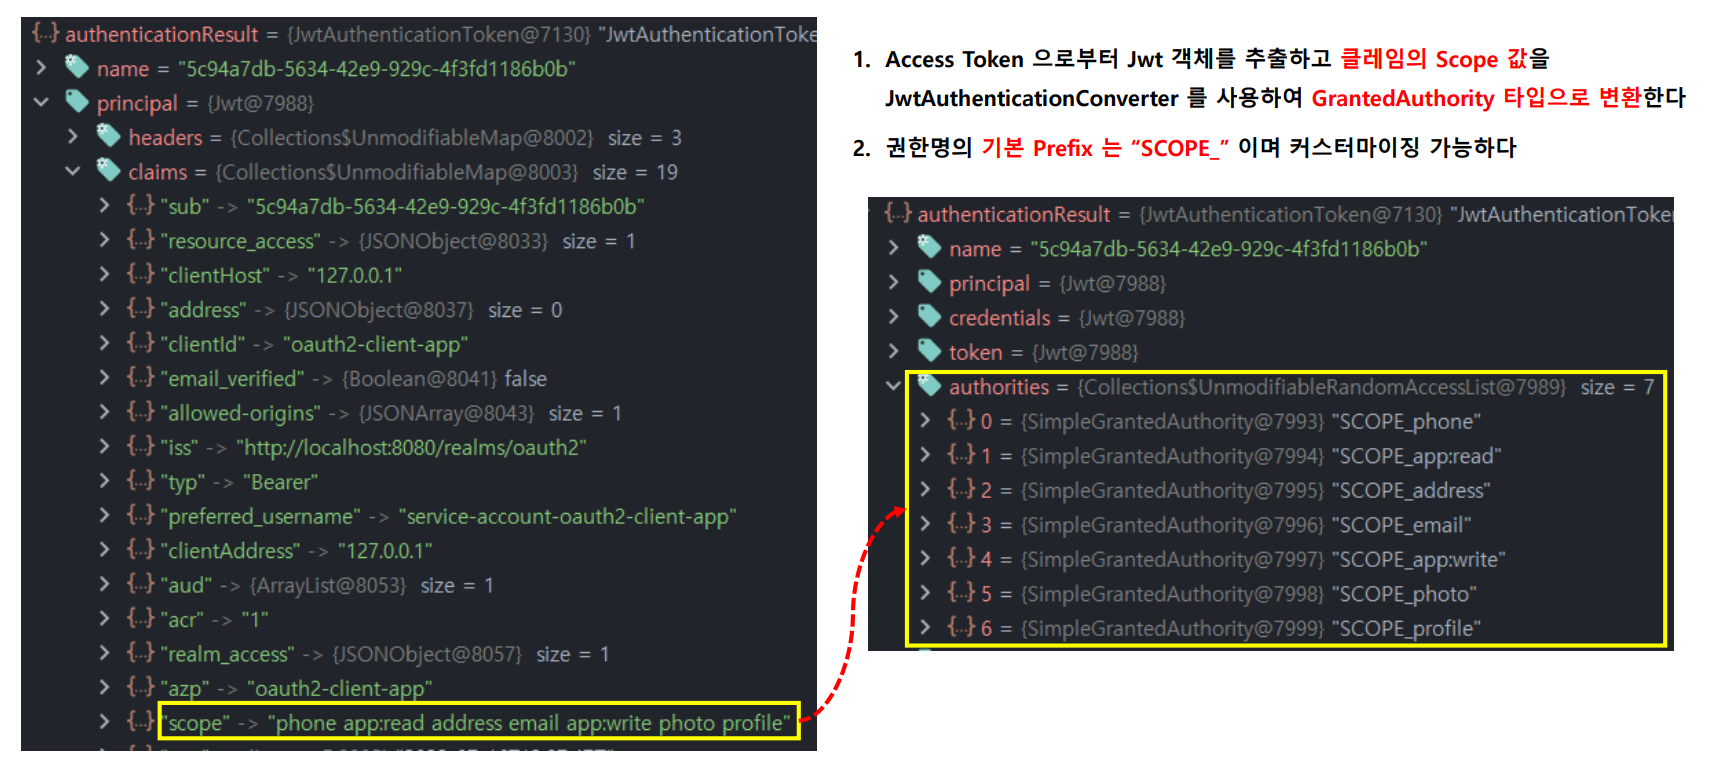
- Access Token 으로부터 Jwt 객체를 추출하고 클레임의 Scope 값을 JwtAuthenticationConverter 를 사용하여 GrantedAuthority 타입으로 변환한다
- 권한명의 기본 Prefix 는 “SCOPE_” 이며 커스터마이징 가능하다
Url 기반 권한 설정
✓ OAuth2ResourceServer
@Configuration(proxyBeanMethods = false)
public class OAuth2ResourceServer {

    @Bean
    SecurityFilterChain securityFilterChain(HttpSecurity http) throws Exception {
        http.authorizeRequests((requests) ->
            requests.antMatchers(HttpMethod.GET, "/photos/**")
            .hasAuthority("SCOPE_photo")
            .anyRequest().authenticated());
        http.oauth2ResourceServer().jwt();

        return http.build();
    }

}
✓ Method Security
@GetMapping("/photos")
@PreAuthorize("hasAnyAuthority('SCOPE_photo','Scope_profile')")
public List<PhotoRest> getPhotos() {

    PhotoRest photo1 = new PhotoRest();
    photo1.setPhotoId("1");
    photo1.setPhotoTitle("Photo 1 title");
    photo1.setPhotoDescription("Photo 1 description");
    photo1.setPhotoUrl("Photo 1 URL");

    return Arrays.asList(photo1, photo2);
}
2. JwtAuthenticationConverter
✓ 개념
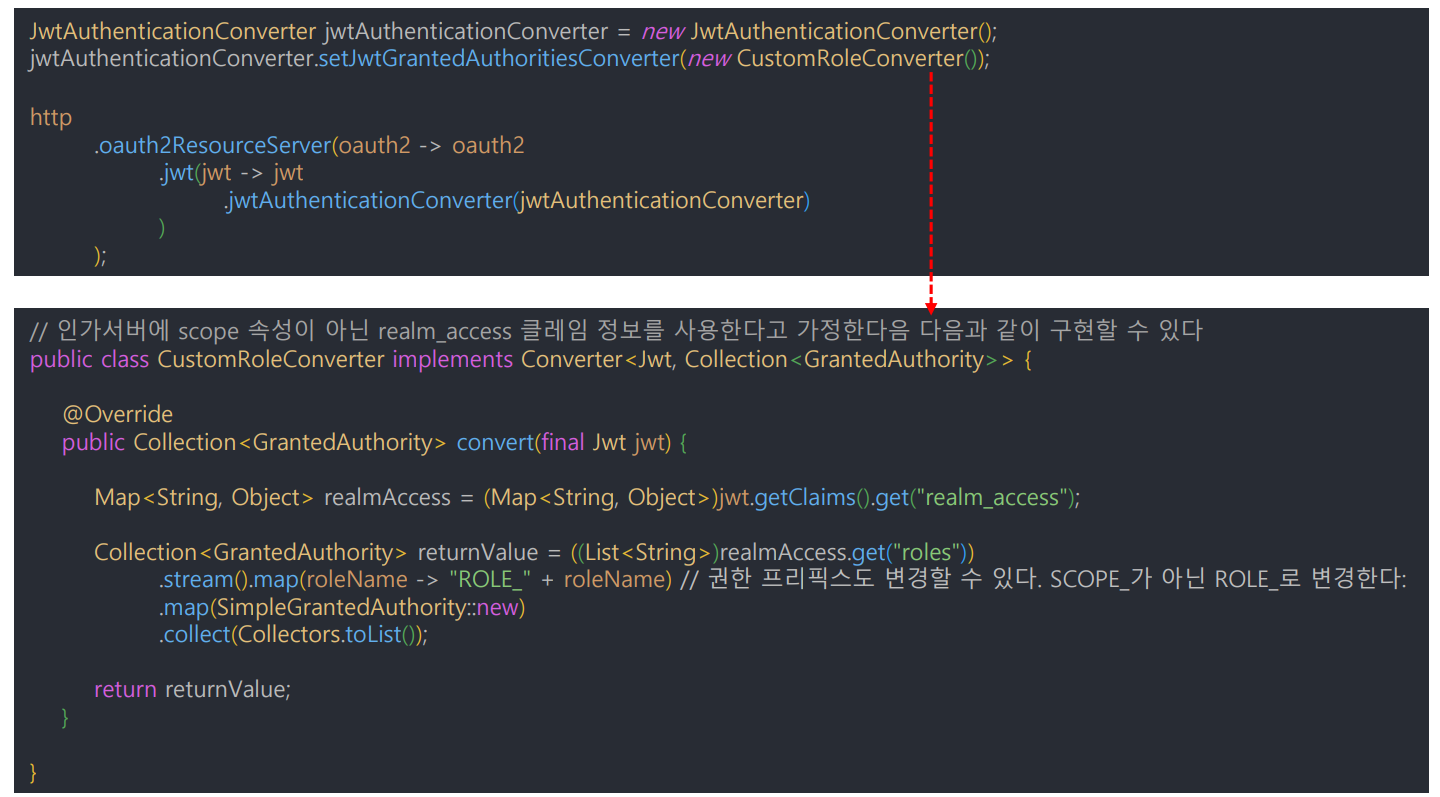
- 인가 서버가 scope 속성 대신 자체 커스텀 속성을 사용하거나 리소스 서버에서 속성을 내부 권한에 맞게 조정해야 할 경우 사용한다
- JwtAuthenticationConverter 는 Jwt 객체를 Authentication 으로 변환하는 클래스이며 권한을 변환하는 JwtGrantedAuthoritiesConverter 를 가지고 있다
댓글남기기